
Easy Finger Lime Curd Recipe (Silky, Tangy & Foolproof)
Learn how to make the best Finger Lime Curd with this easy, foolproof recipe. A stunningly silky, tangy curd using unique Australian citrus. Perfect for tarts!
Discover the vibrant taste of Australia with this easy Finger Lime Curd recipe. If you love the bright tang of a classic lime curd but are looking for something a little more special, you’ve found it. Using finger lime powder, this recipe produces a stunningly silky, intensely flavourful curd that is simply unforgettable. Perfect for the home cook, this foolproof method uses a double boiler to gently cook the eggs, guaranteeing a smooth, rich texture every time. Whether you’re filling a buttery tart shell, topping a classic pavlova, or simply spreading it on warm scones, this Finger Lime Curd is a versatile and delicious addition to your baking repertoire.
Tasting Notes
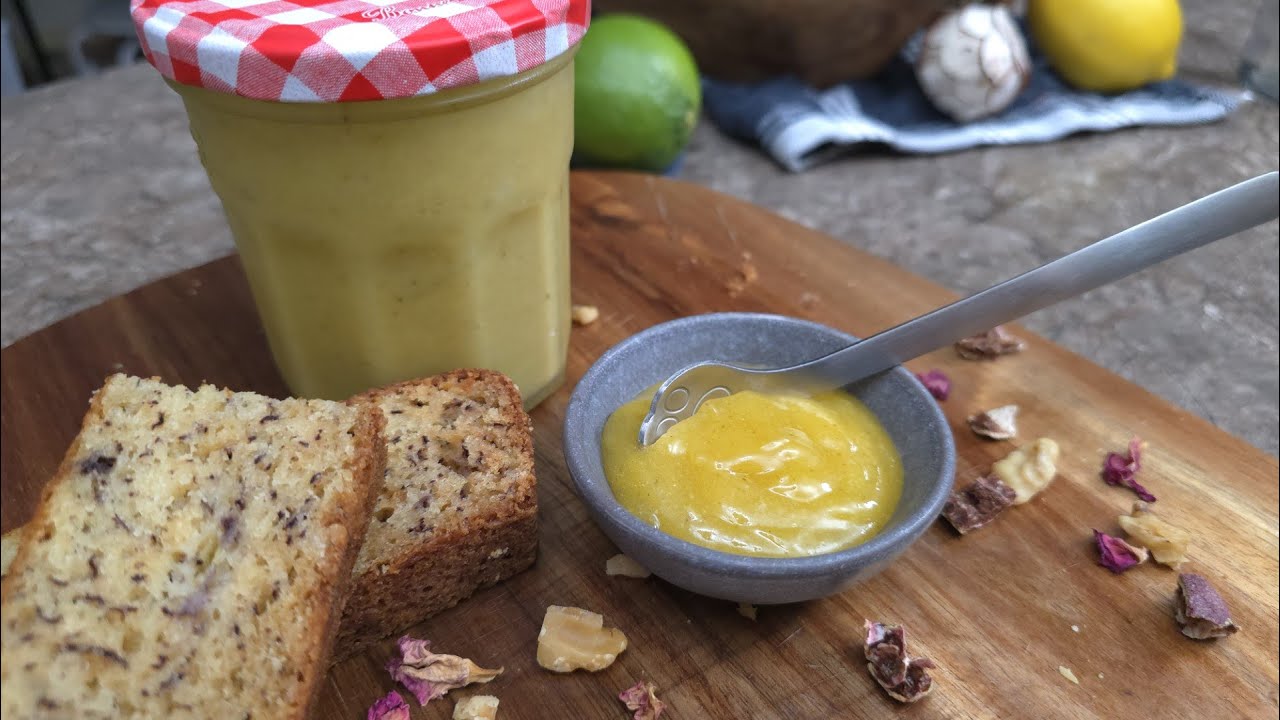
- Appearance: The finished curd is opaque and glossy with a vibrant, pale yellow-green colour reminiscent of early morning sunshine. Its consistency is flawlessly smooth and free of any lumps.
- Aroma: A powerful, zesty fragrance of fresh lime hits you first, followed by a more complex, almost tropical citrus note from the finger lime powder. Underneath, there are rich, comforting scents of butter and sweet cooked sugar.
- Texture: Incredibly silky and velvety smooth on the tongue. It’s thick enough to hold its shape on a spoon but melts away beautifully. Once chilled, it sets to a perfect, spreadable consistency.
- Flavour: A delightful explosion of tangy and tart lime at the forefront, which is immediately balanced by a clean, well-judged sweetness. The finger lime powder adds a unique, slightly floral and zesty dimension that distinguishes it from regular lime curd. A rich, buttery flavour rounds out the finish.
- Mouthfeel: Luxurious and creamy. It coats the palate beautifully without feeling heavy or cloying, leaving a pleasant, zesty aftertaste that invites another spoonful.
‘Tips, Variations, and Troubleshooting’
Tips for Success:
- Low and Slow: The key to perfect curd is gentle heat. Ensure your water is at a gentle simmer, not a rolling boil, to prevent the eggs from scrambling.
- Constant Whisking: Don’t walk away! Continuous whisking aerates the mixture and ensures it cooks evenly for the smoothest possible result. Scrape the bottom and sides of the bowl often.
- Don’t Skip the Sieve: This final step is non-negotiable for a professional-quality, silky-smooth curd. It removes any potential small bits of cooked egg or larger zest pieces.
Variations
- Fresh Finger Limes: If you can get fresh finger limes, use the juice to replace some of the regular lime juice. For that signature “citrus caviar” pop, gently fold the pearls from 2-3 finger limes into the curd after it has been cooked and sieved.
- Other Citrus: This curd method works beautifully with other citrus fruits like lemon, Meyer lemon, orange, or passionfruit. Simply swap the juice and zest accordingly.
Troubleshooting
- My curd is lumpy / looks scrambled: The heat was too high, causing the eggs to cook too quickly. Unfortunately, this can’t be fixed, but heavy straining may salvage some of it. Next time, ensure the water is only just simmering.
- My curd won’t thicken: You may not have cooked it long enough or to a high enough temperature. Continue to whisk over gentle heat until it coats the back of a spoon. Remember, it will thicken significantly more as it cools in the fridge.
- My curd tastes metallic: This can sometimes happen if you use a reactive metal bowl (like aluminium or copper). Always use a non-reactive bowl, such as glass or stainless steel, when cooking with acidic ingredients like citrus.
Equipment List:
- Medium Saucepan
- Heatproof Bowl (glass or stainless steel)
- Whisk
- Fine-Mesh Sieve/Strainer
- Silicone Spatula
- Measuring Cups & Spoons
- Citrus Juicer/Reamer
- Microplane or Zester
- Sterilised Jars for storage
The Recipe
Ingredients:
- 2-3 Limes (for juice & zest, you’ll need approx. 90ml of juice)
- 175g Granulated Sugar
- 2 large whole Eggs
- 2 large Egg Yolks
- 115g Unsalted Butter, cut into small cubes
- 1 Tbsp Finger Lime Powder
Instructions:

Set Up Your Double Boiler
Begin by bringing a medium saucepan with about 2.5-5 cm (1-2 inches) of water to a gentle simmer over medium-low heat. Find a heatproof bowl that can sit comfortably on top of the saucepan without its bottom touching the simmering water.
Combine Ingredients
In the heatproof bowl (off the heat), lightly whisk the whole eggs and egg yolks together. Add the freshly squeezed lime juice, lime zest, sugar, cubed butter, and the finger lime powder. Give everything a brief whisk to combine all the ingredients.


Cook the Curd
Place the bowl containing the mixture over the simmering water.
It’s going to look a bit chunky at this stage, but don’t worry! Trust the process and it will turn out perfectly.
Whisk the mixture continuously. Make sure you scrape the bottom and sides of the bowl frequently, as this is where the curd cooks the fastest.


Thicken to Perfection
Continue to whisk for approximately 15-20 minutes. You will feel the curd gradually thicken. If you are using a thermometer, it is ready when it reaches a temperature of 80-82℃ (175-180℉). Otherwise, test for doneness by checking if the curd is thick enough to coat the back of a spoon—a line drawn through it with your finger should hold its shape.
Sieve for a Silky Finish
Once thickened, immediately remove the bowl from the heat. Pour the hot curd through a fine-mesh sieve into a clean bowl or directly into your sterilised jars. Use a spatula to help press the curd through the sieve, ensuring you get every last drop. This step guarantees an incredibly smooth texture.


Don’t Forget to “Scrape the Bottom” of the sieve.
Cool and Store
If you’re not jarring it immediately, press a piece of plastic wrap directly onto the surface of the curd to prevent a skin from forming. Allow the curd to cool completely to room temperature. Once cool, transfer it to airtight sterilised jars and refrigerate. The curd will continue to thicken as it chills. It can be stored in the refrigerator for up to 2 weeks.


Easy Finger Lime Curd Recipe (Silky, Tangy & Foolproof)
Ingredients
Equipment
Method
- Bring 1-2 inches of water to a simmer in a saucepan to create a double boiler.

- In a separate heatproof bowl, lightly whisk eggs and yolks.
- Add lime juice, zest, sugar, cubed butter, and finger lime powder to the eggs. Whisk to combine.

- Place the bowl over the simmering water.

- Whisk continuously, scraping the bottom and sides, for 15-20 minutes until thickened. The curd should reach 80-82 Celsius (175-180 Fahrenheit) or coat the back of a spoon.

- Remove from heat and immediately pour through a fine-mesh sieve into a clean bowl or sterilised jars.

- Press plastic wrap onto the surface if not jarring immediately.
- Cool to room temperature, then transfer to airtight jars and refrigerate. Curd will thicken further upon chilling. Store in the fridge for up to 2 weeks.

Nutrition
Video
Tried this recipe?
Let us know how it was!Subscribe for Updates!
Subscribe to be the first to learn about a new recipe

Hi, I’m Dael!
I create easy-to-follow recipes for busy home cooks. My goal is to demystify the kitchen and help you eat well every day.


Tangy with the perfect amount of sweetness. The finger lime powder takes this Curd to the next level